

 2595
2595
Creating New User (User Management/User tab)
1. Click the green button labeled "New" on the right side of the screen
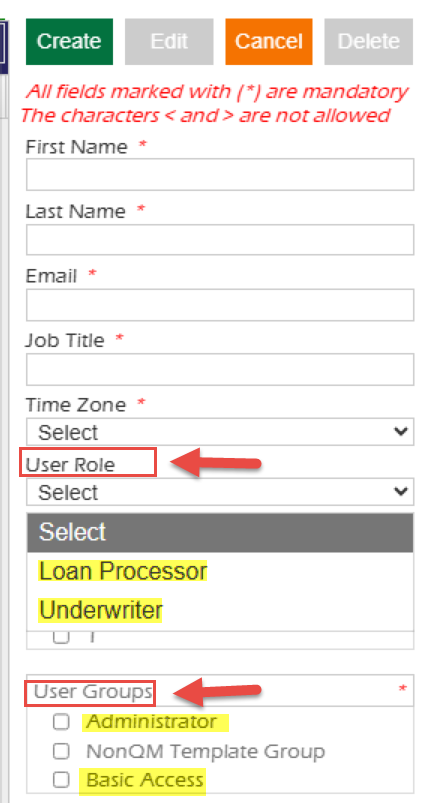
2. Complete name, email, job title, time zone, and user's role information in the right panel, based on the following criteria:
Please note that there are only two User Roles available:
- Loan Processor - Any user who will prepare a file for risk (e.g., Loan Officers, Processors, Jr. UWs, etc.)
- Underwriter - Any user who will use the Excel output to assess risk (e.g., UWs, Jr. UWs, Risk Managers, QC, etc.)
Fill in the following information fields:
- First Name: Enter the first name of the user.
- Last Name: Enter the last name of the user.
- Email: Enter a unique email address for the user. This is the user's Login ID, and all email notifications will be sent to this email ID. Follow the standard email format (e.g., [email protected]).
- Job Title: Enter the user's designation.
- Time Zone: Select a time zone for the user from the dropdown.
- User Role: To assign a Role to the User. Use the dropdown to choose either "Loan Processor" or "Underwriter". NOTE: Assigned roles don't give the user administrative access.
- User Groups: Assign a group to the user. Check the appropriate box to choose either "Administrator" or "Basic Access"(non administrator right). If no group is assigned to the user, then that user can access only the Dashboard section of LoanBeam. NOTE: "NonQM Template Group" will provide access to use the NQM template for apps.


- Office Location: Check the box against the Office Location that you want to assign to the user. Multiple locations can be assigned to a user.

Notes:
The user can view only loan applications added to the location(s) assigned to them.
If a user is assigned to the default location "Corporate," they have access to all loan applications added to their account.
This is how a user account should look, once established

Edit User
To edit a user, select the user from the user's list displayed in the left pane and click on the "Edit" button.

Edit the details and upon editing, click on the "Update" button. The edited fields are updated and saved and display in the user details grid.

If you want to cancel the action i.e. do not want to save the changes then click on "Cancel" button.
The columns for "Modified By" and "Modified On" will be auto-populated as per the system date and time, and cannot be edited.

